If you share the love of holiday décor and DIY, you’ll no doubt be obsessed with these festive Christmas crafts and they are affordable!
⭐️They will be extra special because you’ll be making them with your own two hands, they’ll definitely capture those “little hints of Christmas” and make it feel extra special each year!
Some ideas:
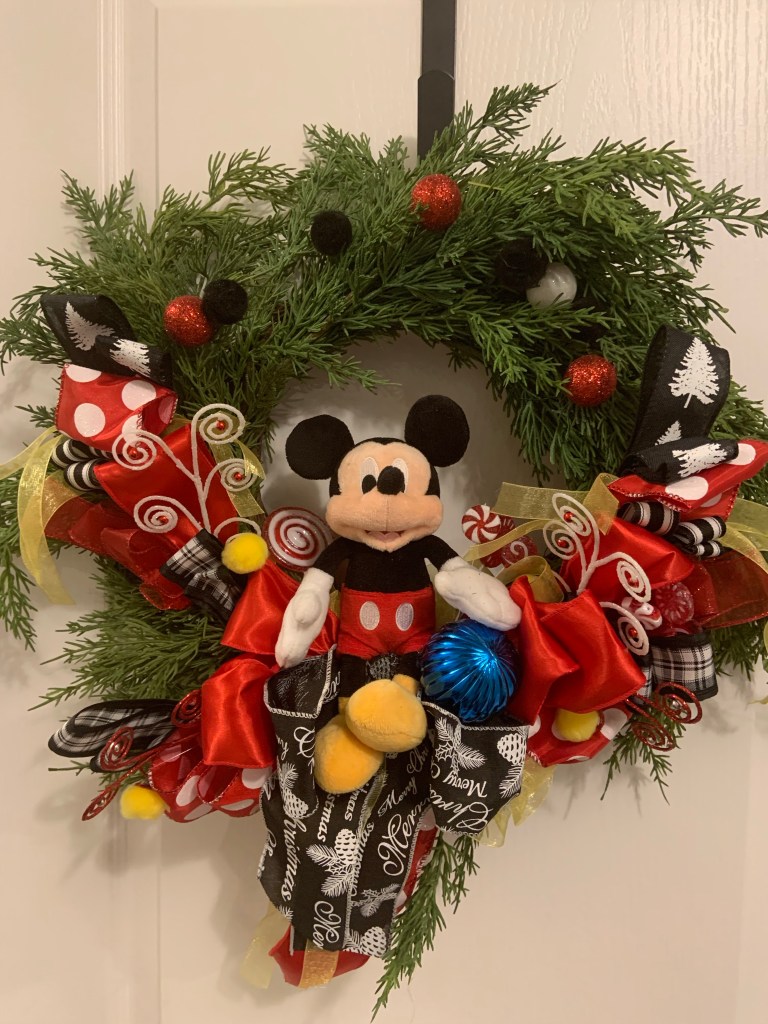
-DIY wreaths- can even use your babies gloves as a feature to remember. (Joann for most of my items)
– Salt Dough Ornaments!
-Repurposing an old Bike !
-Fire Place Garlands!
Whichever one of these DIY holiday project you decide to make, there’s no doubt that they’ll look fabulous alongside your Christmas decor .
Hint: I use the same various ribbon each year on each of my diy crafts to give them a change and matchy coordinated feel!
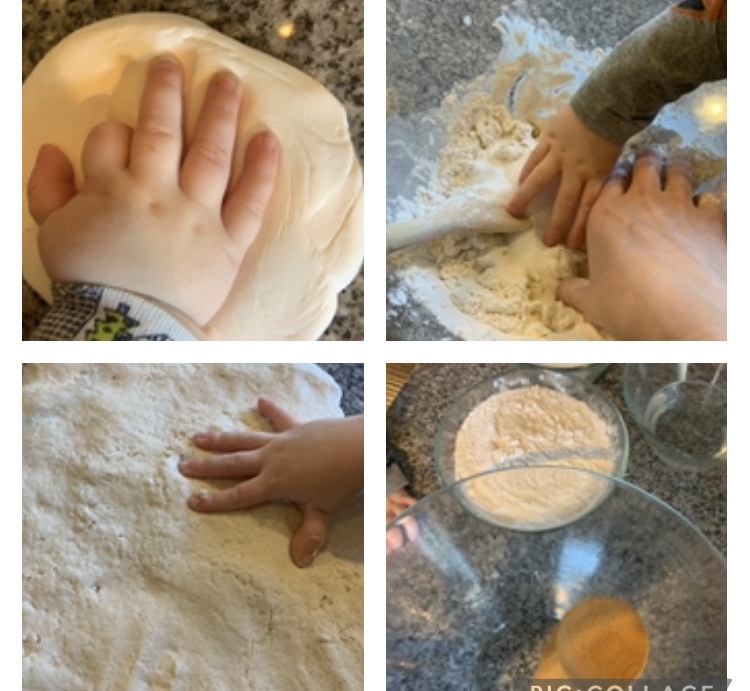
Salt Dough Ornament
- All-purpose flour (4 cups)—I recommend sticking with all-purpose flour here because it’s affordable, it’s easy to work with, and it creates the most consistent color. Bleached all-purpose flour is best. (I recommend aldi)
- Table salt (1 cup)—Again, make sure to add the salt to preserve these ornaments! Just like with the flour, go with the generic brand table salt here—reserve your high-end Himalayan sea salt for cooking.
- Warm water (1 1/2 cups)—The warm water helps the dough come together a little bit easier. Plus, you’ll knead the dough with your hands, and warm dough is so much more comfortable to knead in the winter!
STEPS:
- In a large mixing bowl, stir together the flour and salt.
- Gradually add water while stirring and mixing to form a dough with a Play-Doh like consistency.
- Form the dough into a ball and knead for approximately 5 minutes, adding a bit more flour if the dough is too sticky or a bit more water if it’s too dry.
- Begin making the desired shape on parchment paper. Rolling pin can really help to make a flat surface
- Start making hand and footprints . Don’t worry if you mess up roll and do again!
- Just place your salt dough crafts on a baking sheet and pop them into a 200-degree oven. Baking time will vary based on the size and thickness of your crafts, so just keep a close eye on them!
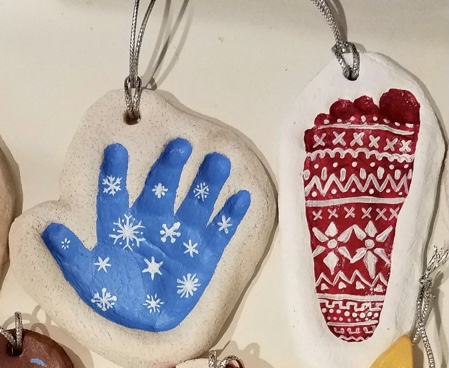
Happy Crafting!!
DIY BICYCLE
1. Find an old bike for the purpose of this one I found one with a basket
2. Gather fake flowers fun ribbons !! I always use a ribbon to tie and all of my home decor each year , that way I can kind of change it up but not totally change all the DIY projects.
3. Combine everything together don’t be afraid to walk back and check it out see how it looks!
4. For a pop at night I use this battery powered timer lights . Linked below ! (Secret how I floating lights all over)
Below are some Other home projects that are around her

All photos are owned by steals and deals please tag for re-posting!
