Getting Ready
While you order is printing and shipping for Photo wall (here’s what I got) begin preparing your space for installation. It’s hard to pick your design but when in doubt order sample patches or look at the IG! Don’t forget this is high end wallpaper so any will most likely look great!
NOTE: order their kit comes with everything you need tool wise and you can save for the future!
Prepare Your Walls
You may need a couple days or up to four weeks to prepare your walls. You must:
- ensure your wall is smooth, clean and dust-free
- patch or sand any damaged areas on the wall, especially where sharp edges might pierce or tear the wallpaper. Take off outlet covers. And wipe off any stains
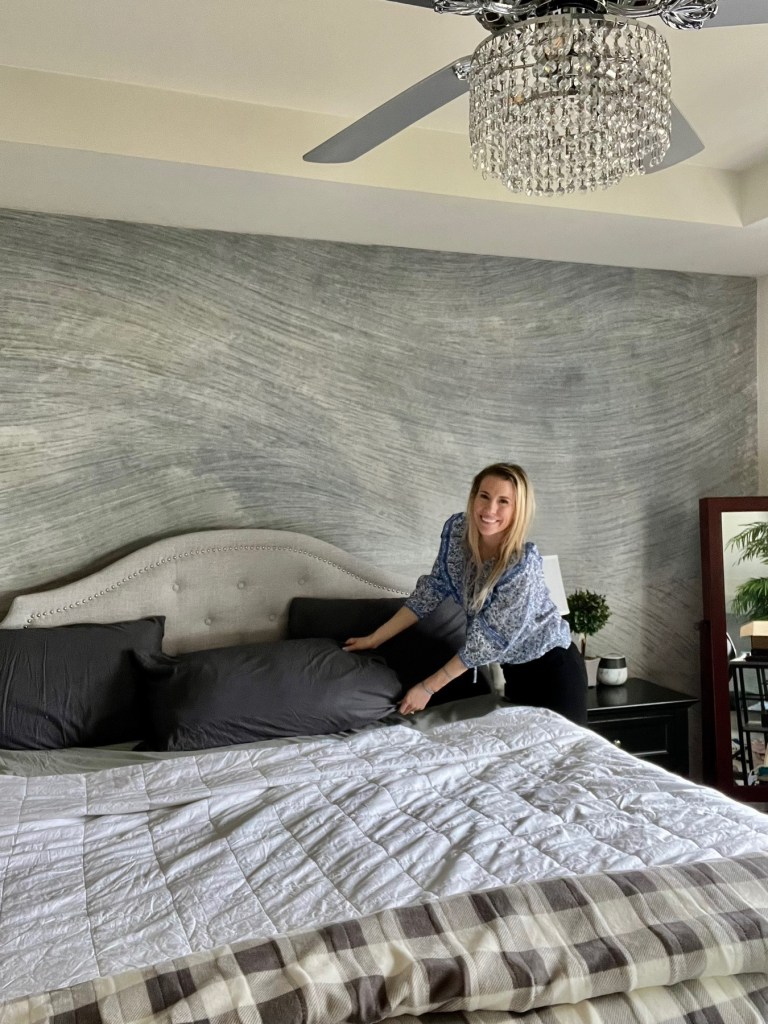
For best results apply to a surface that is a solid, light color. We have not tested installation directly over other wallpaper, or over wall paper that has been primed.
Installation is not recommended:
- on walls with texture
- over “scrubbable” paints
Find a Friend and Set Aside Some Time
Hanging wallpaper seems to be a lot easier with two people
Collect Materials
I just bought the wallpaper starter kit had everything I needed
Drop cloth or towels
Bucket (or paint tray if using a paint roller) of clean water (gallon)
Installation
You install from the top down, but a longer roll might set up a repeat that your shorter rolls cannot match. However, if you start with a shorter roll, the longer roll may install more effectively.
- When installing around doors or windows, apply the wallpaper as normal. However, you may want to cut away any extra bulk that is not installing to the wall. Still wait until the paper has fully dried (3 or more hours) before trimming it flush to the moulding.
- Installing corners, either interior (in a room) or exterior (around edge), may offer a challenge, especially when you are installing more than half a roll (12+”, 30 cm) from one wall surface to the next. Consider this issue when you determine your starting point. In a perfect scenario, installing only few inches of paper across an edge is best. It is easier to keep the paper level and there isn’t too much extra weight to balance.
- Do not cut the paper for corners because it will cause problems with your seamless overlap.
- Since installation will vary from room to room, search online for additional ideas for navigating around switches, electrical plugs, window hardware and more.
Finishing Up
Once you’ve installed all the panels it is time for the finer details for a professional look:
- Let your paper dry completely – at least 3 hours – to guarantee it has returned to it’s original size
- Use a sharp utility knife with a good grip to trim the extra paper around the frames of windows and doors, and across the ceiling and by the baseboard. It offers stability so the blades and wobble as you cut with a straight edge. Don’t be frugal, either! Sharp blades cut cleaner lines
- Wipe down the walls with a damp sponge to remove any excess adhesive
- Recycle any leftover bits of paper
- Stand back, admire your work and share a pizza with your friend


Check out the YouTube and watch the progress:
